
Before and After - Creative Editing
I consider myself more of an artist than a photographer, so while my medium of choice is photography, the most enjoyable part of the process for me are the creative and artistic edits I make to achieve the final image. Some of my edits are simple and occasionally I will share an image with only color and exposure changes. However most of my editing is detailed.
This tutorial is a good, high level overview for someone just starting out, who wants to understand how to edit a floral image to achieve a more artistic and painterly look.
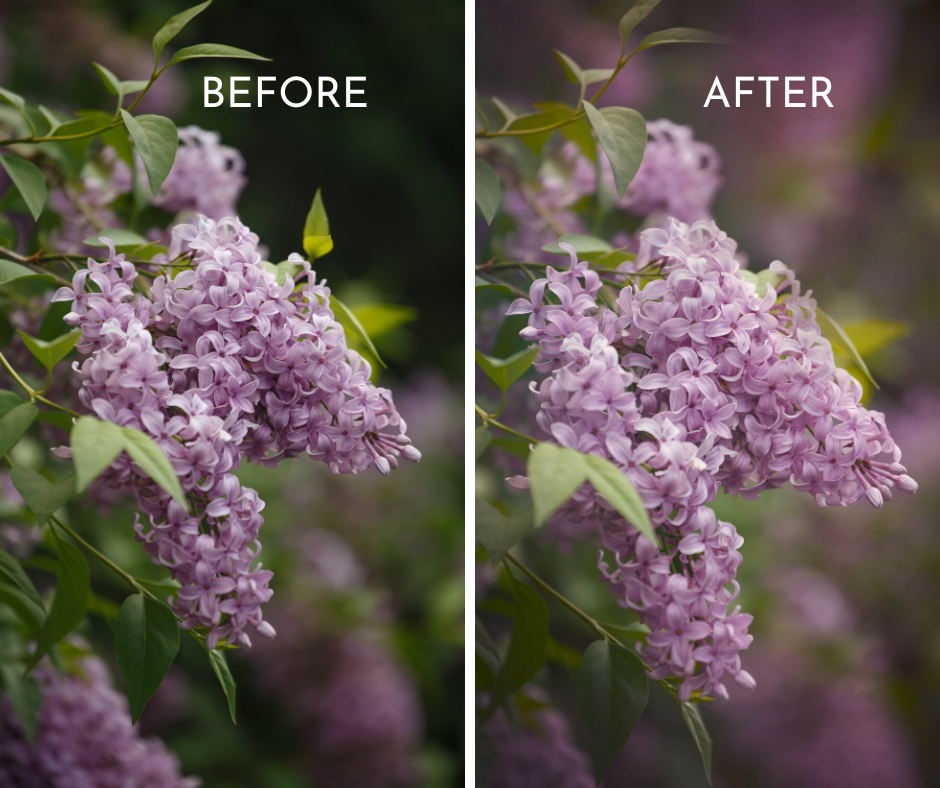
For this lesson, I’ve chosen a lilac photo I had taken earlier this year. It’s probably not a photo I would consider selling but it was a great one to use for a tutorial like this.
Final Before and After Images
I used the following tools for this edit:
Adobe Photoshop Creative Cloud and Adobe Lightroom
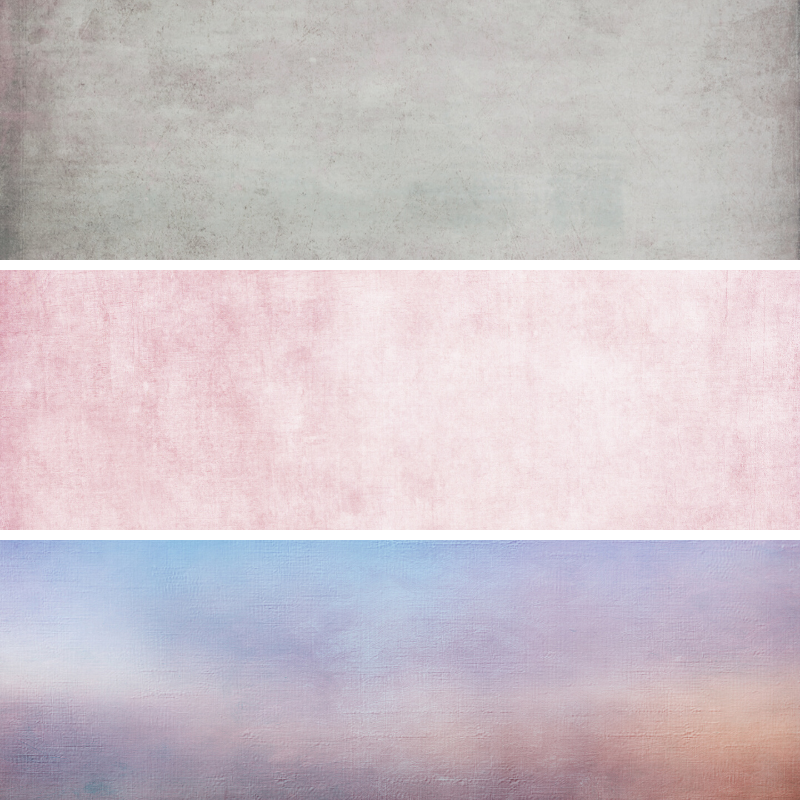
Kim Klassen textures (I use several of her free textures which are quite delicate and lovely)
I love using textures but I always prefer them to be delicate and subtle, especially when working with floral images. Textures can add more depth to the final image, giving it a bit of a painterly look. For this print, I used the following textures:
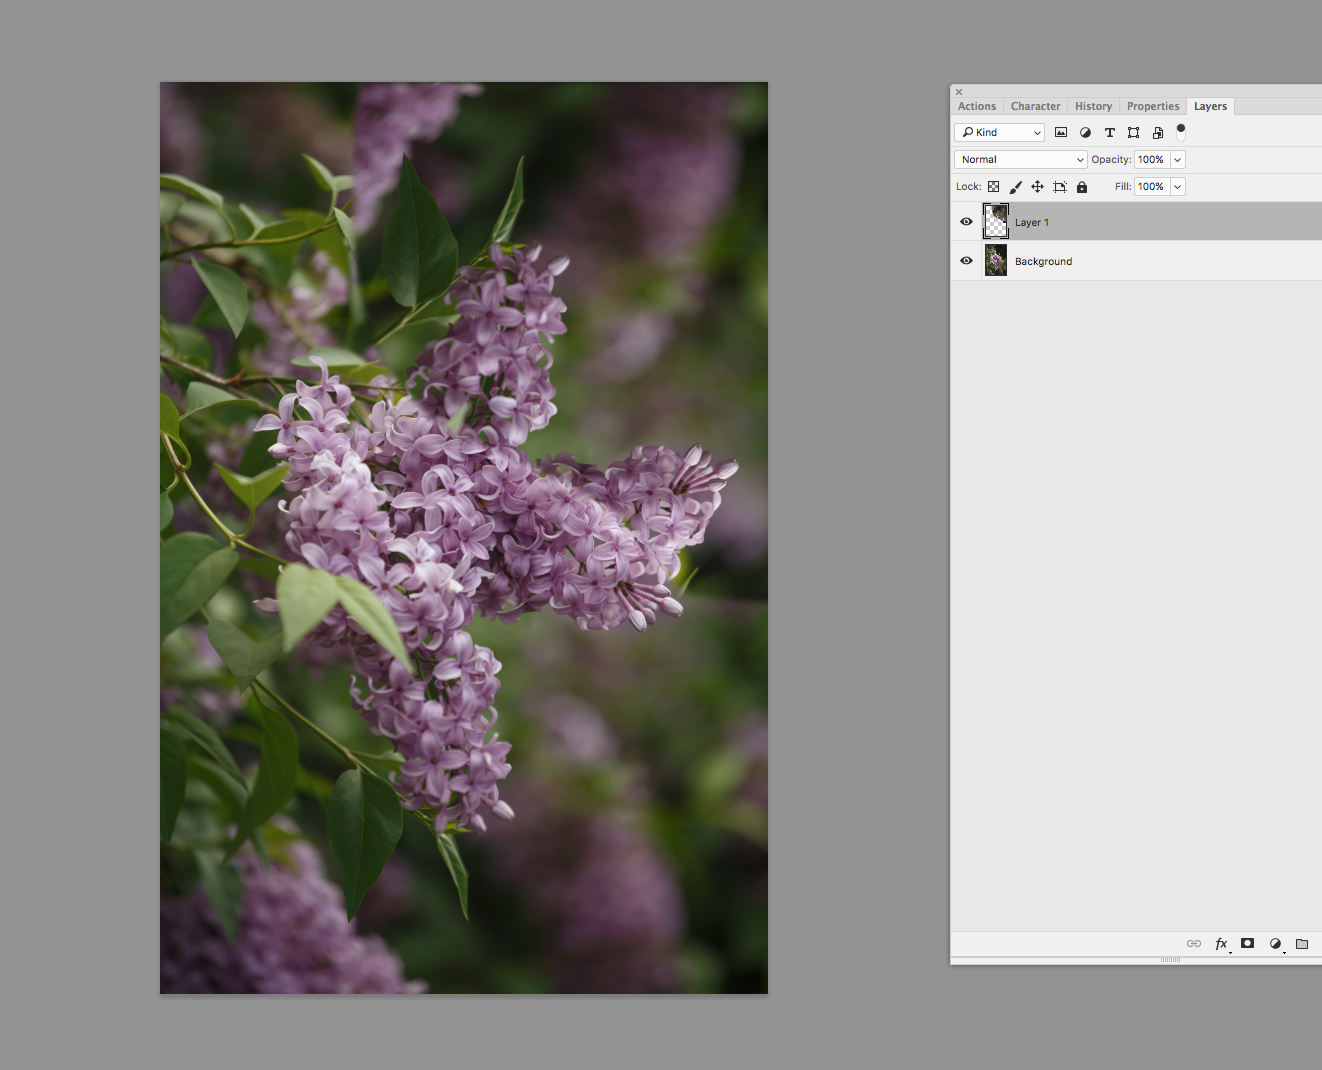
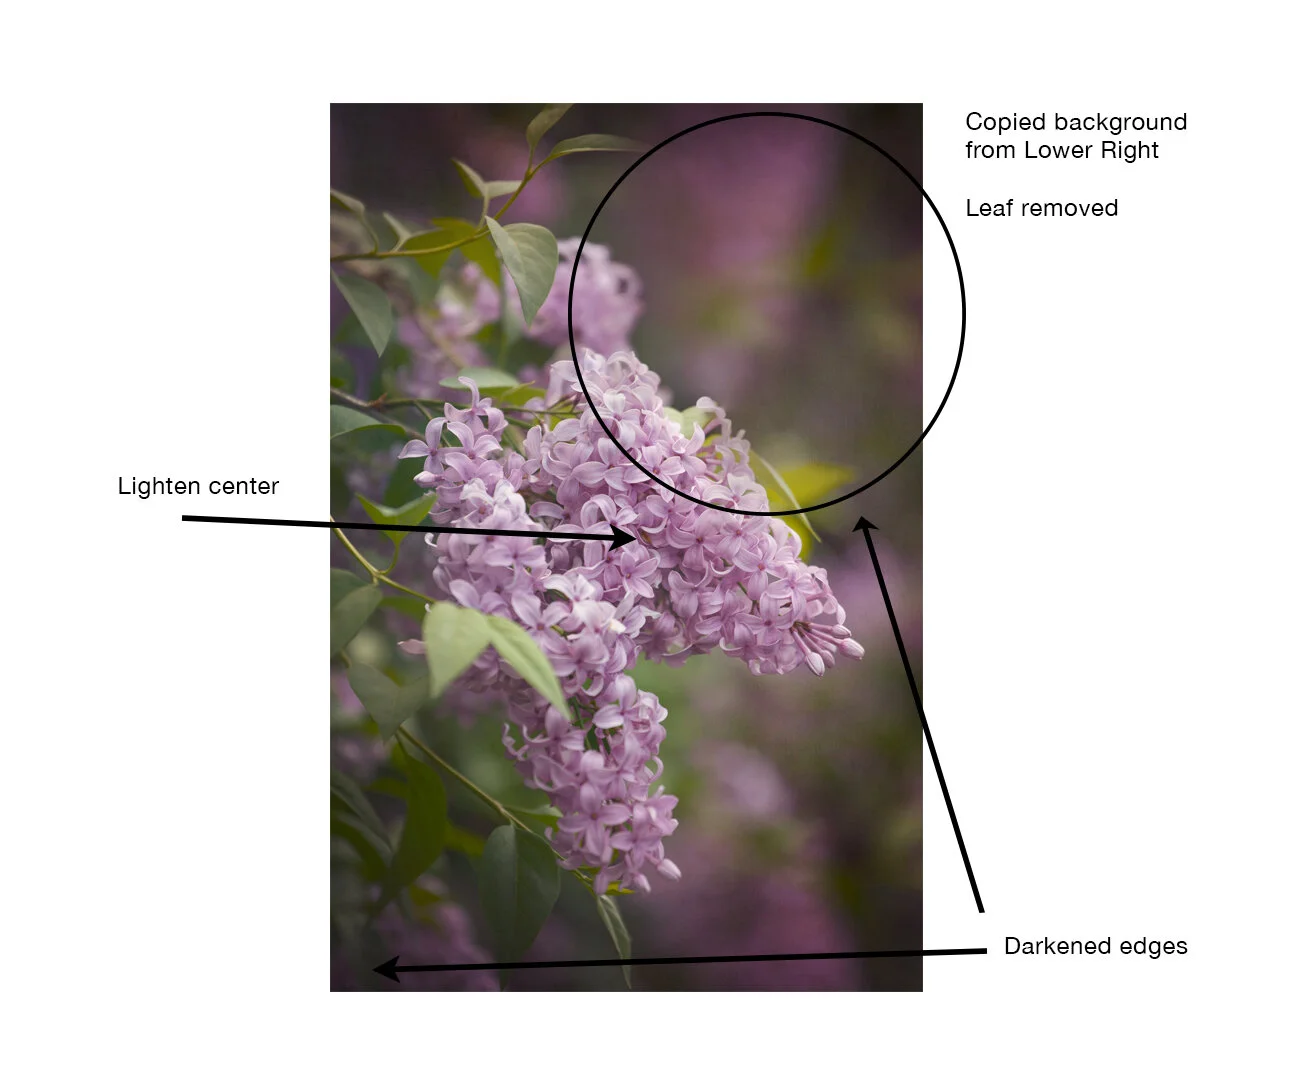
Before I added the textures, I made some key changes to the original picture. I felt the area in the top right corner was too dark and I wanted there to be more lilac in the background. I selected the area I wanted, using the Lasso tool, feathered to 20 pixels, and pasted it into a new layer which I then flipped vertically. I erased around the edges until the blending was seamless and merged the layers together.
I also removed one of the leaves on the top of the main lilac flower because I found it distracting.
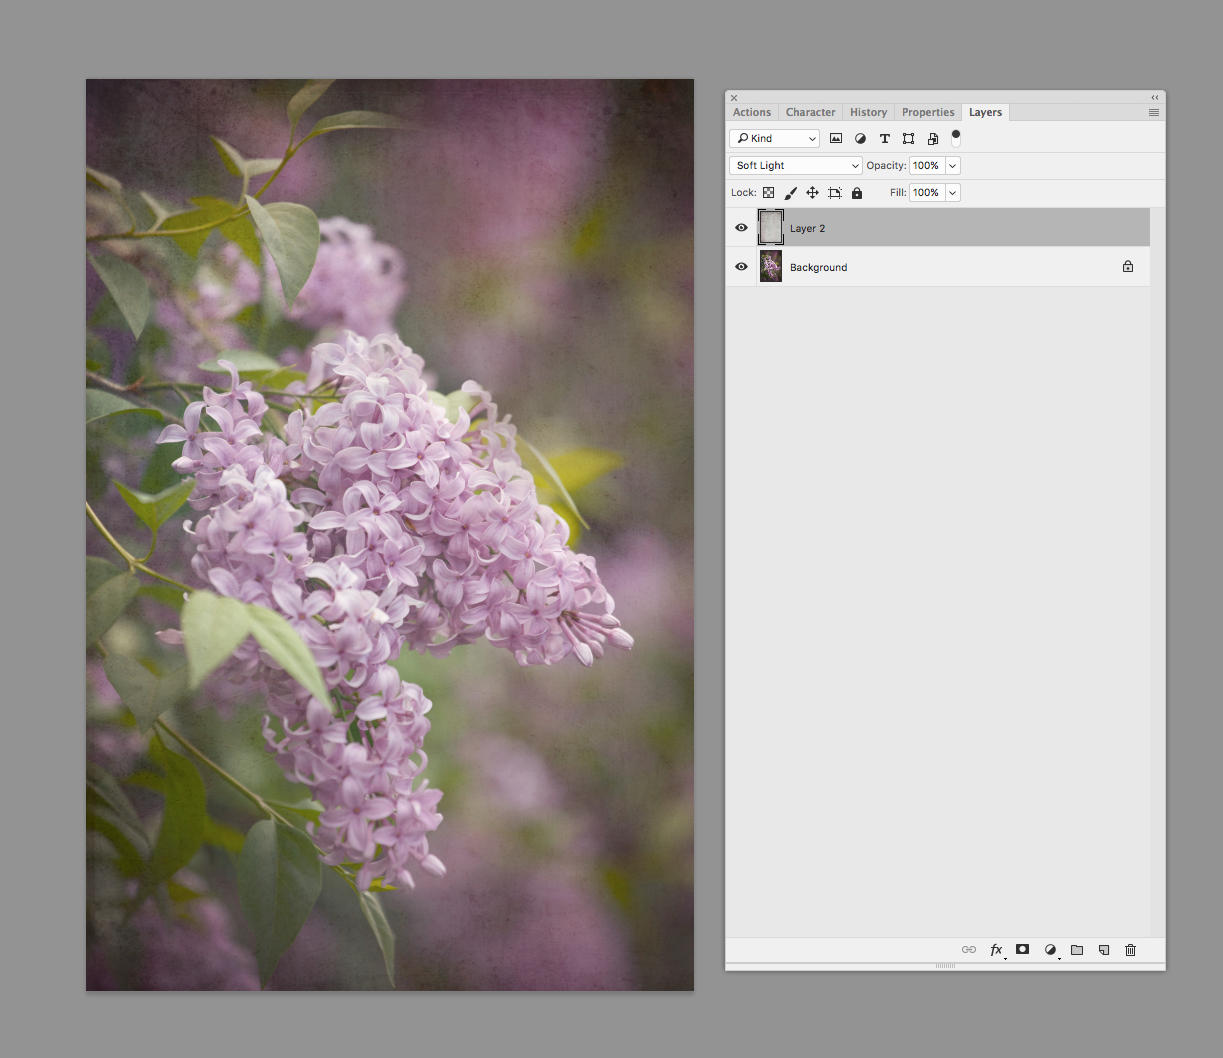
Once this was done, I began adding my texture layers. Each texture is dropped in to a new layer in photoshop. I set the layer blend mode to Soft Light or Overlay and reduce the opacity to around 20-50% depending on the effect. I generally prefer a more delicate look so my layer opacities are always relatively low and I almost always use the Soft Light blend mode because it has the most subtle feel to it.
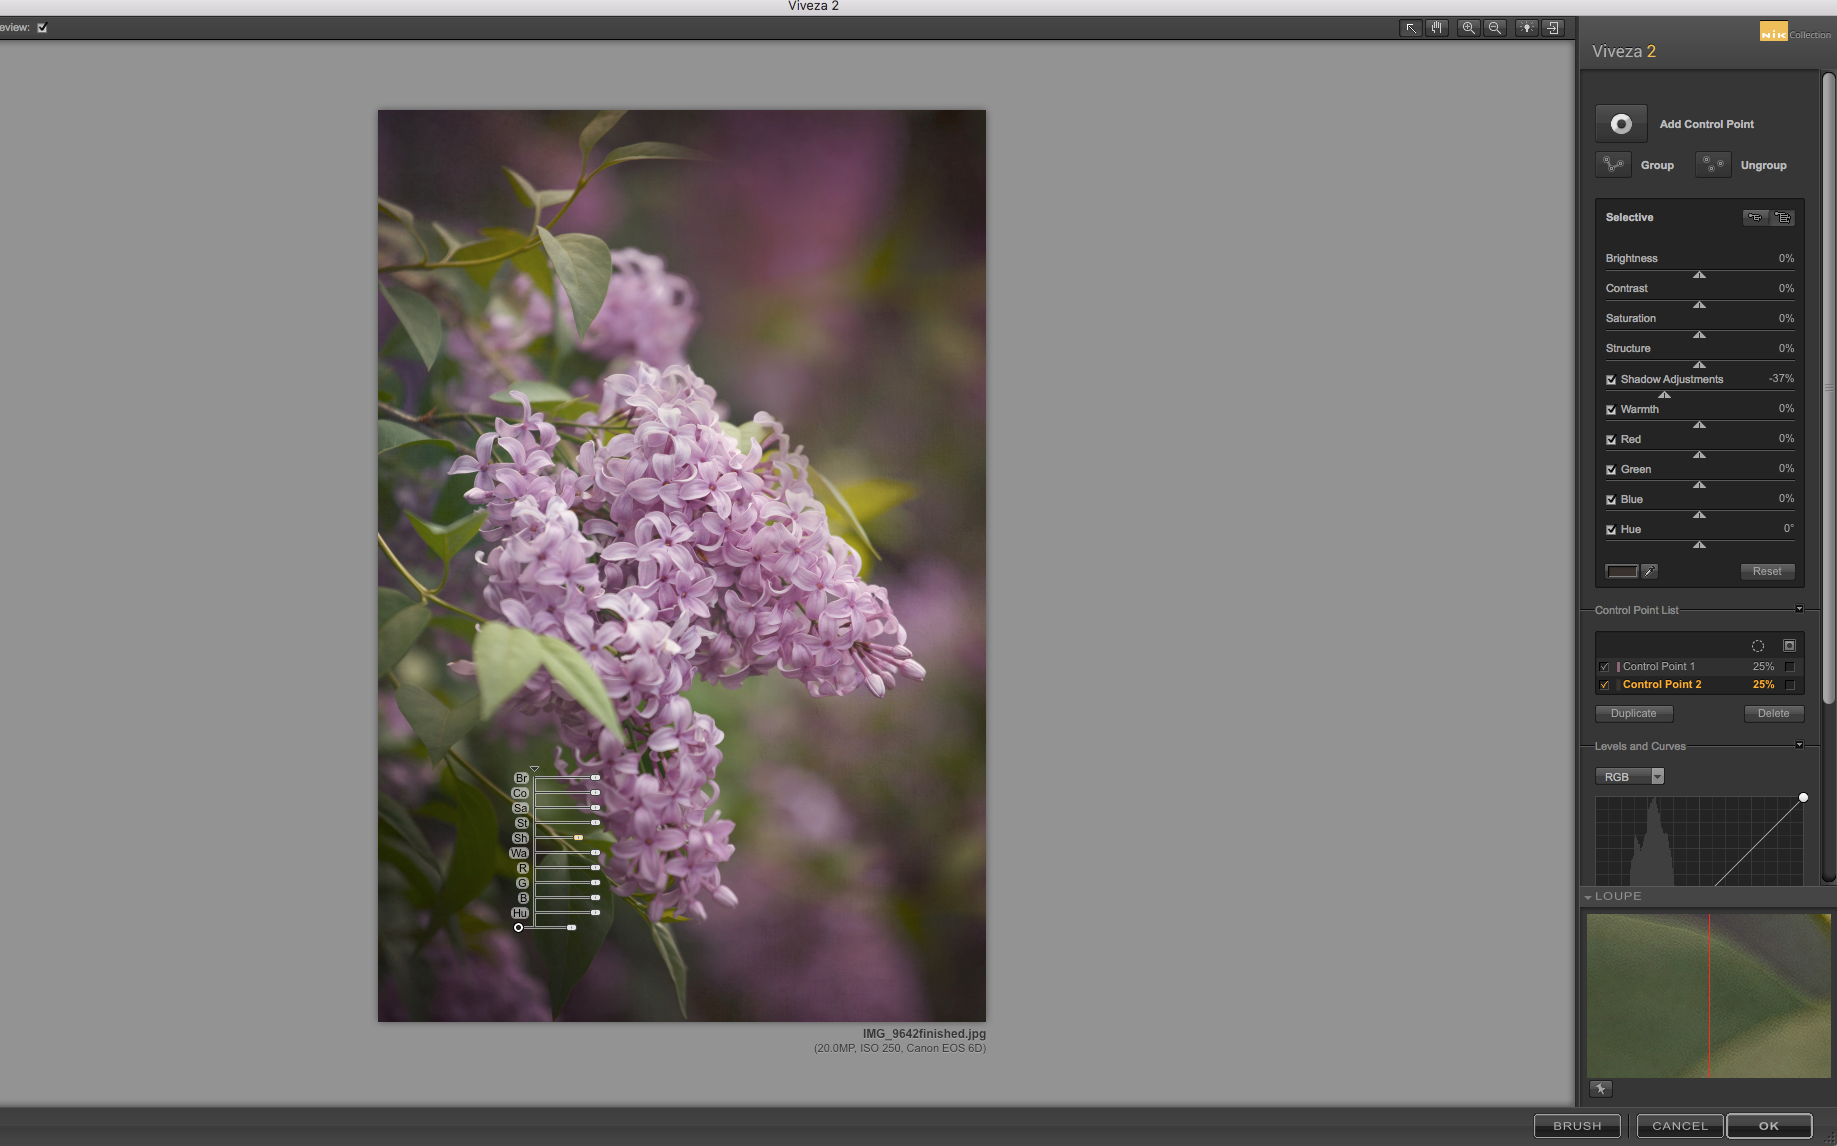
Once I finished adding my textures, I opened the image in Nik Color Efex Pro and warmed it up by bout 10%. (You can also do this right in photoshop using Hue/Saturation and adding both yellow and red to the mid tones). Using Nik Viveza, I made Shadow adjustments and reduced Structured sharpening . Reducing Structure along the edges gives the background a bit more softness and dreamy quality. Again you can do this right in photoshop using the Blur tool but I prefer the control that Viveza offers.
Finally, when I am finished with these steps, I darkened the edges to bring the focus to the main lilac flower. I did this using the Burn tool in photoshop. I set the Range to Shadows and exposure at around 5%.
I hope you enjoyed this Before and After. I’ll try to share one that is a bit more detailed next time to show you how you can really make an image pop.